Cheese & Prosciutto Stuffed Chicken


Cheese & Prosciutto Stuffed Chicken

Cheese & Prosciutto Stuffed Chicken

 Recipe provided courtesy of Taste of Home magazine.  Find more great recipes at

www.tasteofhome.com

Prosciutto, sun-dried tomatoes and herb cream cheese make a delectable surprise when you cut into these lovely chicken rolls.  They’re topped with a yummy blue cheese sauce.

        Gilda Lester                                                                       Millsboro, Delaware


Cheese & Prosciutto Stuffed Chicken Recipe

Cheese & Prosciutto Stuffed Chicken

4 boneless skinless chicken breast halves (6 oz. each)

½ cup spreadable garlic and herb cream cheese

4 thin slices prosciutto

¼ cup chopped oil-packed sun-dried tomatoes

8 fresh basil leaves

¼ cup flour

2 eggs

2/3 cup dry bread crumbs

3 Tbsp. olive oil

Sauce:   1 cup heavy whipping cream

1 Tbsp. finely chopped shallot

¾ cup crumbled Gorgonzola cheese

¼ tsp. salt

¼ tsp. pepper

Minced fresh basil

Flatten chicken breasts to ¼ inch thickness; spread 2 tablespoons cream cheese down center of each.  Top with one slice of prosciutto, 1 tablespoon of tomatoes and two basil leaves.  Roll up and tuck in ends; secure with toothpick.

Place flour and eggs in separate shallow bowls.  In another shallow bowl, combine bread crumbs and Romano cheese.  Dip chicken in flour, eggs and then coat with bread crumb mixture.

In a large skillet, brown chicken in oil in batches.  Place seam side down in a greased 11×7 inch baking dish.  Bake, uncovered, at 350 F. for 35-40 minutes or until a meat thermometer reads 170 F.

In a small saucepan, heat cream and shallot over medium heat until bubbles form around sides of pan.  Stir in the Gorgonzola cheese, salt and pepper.  Cook for 4-6 minutes or until cheese is melted, stirring occasionally.

Discard toothpicks.  Drizzle chicken with sauce; sprinkle with minced basil.

4 servings


(Recipe for Cheese & Prosciutto Stuffed Chicken came from Taste of Home 2013

 

PrintFriendlyShare

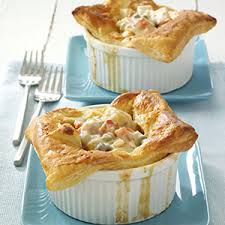
Individual Turkey Potpies

Individual Turkey Potpies

Individual Turkey Potpies


Savory, creamy potpies are a great way to make those old leftovers new again.  These are not your grandma’s pot pies…they are made with fresh herbs, a silky homemade Dijon sauce and a puff pastry top.

           Victoria Bond                                                            Tempe, Arizona


Individual Turkey Potpies Recipe

Individual Turkey Potpies

2 ½ cups cubed peeled potatoes

1 cup chopped onions

¾ cup sliced fresh carrots

½ cup chopped celery

1 Tbsp. olive oil

2 garlic cloves, minced

2 cups cubed cooked turkey

½ cup fresh peas

½ tsp. minced fresh thyme or 1/8 tsp. dried thyme

½ tsp. minced fresh rosemary or 1/8 tsp. dried rosemary, crushed

¼ tsp. salt

1/8 tsp. pepper

Sauce:   ¼ cup butter. cubed

6 Tbsp. flour

2 cups 2% milk

1 cup chicken broth

½ cup heavy whipping cream

3 Tbsp. Dijon mustard

1 Tbsp. capers, drained

1 tsp. minced fresh tarragon or ¼ tsp. dried tarragon

1 tsp. minced fresh thyme or dried thyme

1 tsp. minced fresh rosemary or ¼ tsp. dried rosemary, crushed

½ tsp. rubbed sage

½ tsp. dried marjoram

¼ tsp. ground nutmeg

¼ tsp. salt

1/8 tsp. pepper

Crust:   1 sheet frozen puff pastry, thawed

1 egg

1 Tbsp. water

2 Tbsp. grated Parmesan cheese

In a large skillet, sauté the potatoes, onions, carrots and celery in oil for 8 minutes.  Add garlic; cook 1 minute longer.  Stir in the turkey, peas, thyme, rosemary, salt and pepper; heat through.

In a large saucepan, melt butter.  Stir in flour until smooth; gradually add milk, broth and cream.  Bring to a boil; cook and stir for 1-2 minutes or until thicken.  Stir in the mustard, capers, herbs, nutmeg, salt, pepper and potato mixture.  Divide among six greased 10 oz. ramekins.

On a lightly floured surface, roll out puff pastry into 13 x 9 inch rectangle.  Cut into six squares.  Place one pastry over each ramekin; pressing to seal edges.  Beat egg and water; brush over pastry.  Sprinkle with cheese.

Place ramekins on a baking sheet.  Bake, uncovered, at 400 F. for 20-25 minutes or until golden brown.

6 servings


(Recipe for Individual Turkey Potpies came from Taste of Home, 2013)

PrintFriendlyShare

Hazelnut Mocha Eclairs


Once you try these, especially the filling, you’ll be in heaven.  They make a special ending to a meal or treat to afternoon coffee clutch.


Hazelnut Mocha Eclairs

Hazelnut Mocha Eclairs

         Carol Witczak                                                                   Tinley Park, Illinois


 Hazelnut Mocha Eclairs Recipe

Hazelnut Mocha Eclairs

½ cup water

½ cup 2% milk

½ cup butter, cubed

1 Tbsp. sugar

¼ tsp. salt

1 cup flour

4 Eggland’s Best Eggs

Filling:   1 Tbsp. instant coffee granules

1 Tbsp. boiling water

2 cups heavy whipping cream

¼ cup confectioners’ sugar

½ cup chopped hazelnut, divided

Topping:    ½ cup milk chocolate, melted

In a large saucepan, bring the water, milk, butter, sugar and salt to a boil.  Add flour all at once and stir until smooth balls forms.  Remove from the heat; let stand for 5 minutes.  Add eggs, one at a time, beating well after each addition.  Continue beating until mixture is smooth and shiny.

Transfer to a heavy duty resealable plastic bag; cut a 1 inch hole in one corner of bag.  Pipe 3 inch strips about 3 inches apart on greased baking sheet.    Bake at 400 F. for 10 minutes.  Reduce heat to 350 F.; bake 15-20 minutes longer or until golden brown.

For filling, dissolve coffee granules in boiling water; cool.  In a small bowl, beat cream and confectioners’ sugar until stiff peaks forms.  Fold in coffee mixture and ¼ cup hazlenuts.  Refrigerate.

Fill the eclairs just before serving; replace tops.  Spread with melted chocolate.  Sprinkle with remaining hazlenuts.  Refrigerate leftovers.              14 servings

(Recipe for Hazelnut Mocha Eclairs came from Taste of Home (tasteofhome.com)

PrintFriendlyShare

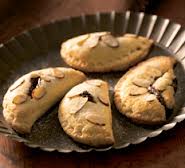
Chocolate-Almond Half Mood Pies


Chocolate-Almond Half Moon Pies

Chocolate-Almond Half Moon Pies

Hand pies are all the rage, and this one doesn’t disappoint.  Chocolate and almond are an irresistible pairing, especially when blended with cream to make a sweet filling for a tender cream cheese crust.


Chocolate-Almond Half Mood Pies Recipe

Chocolate-Almond Half Moon Pies

Crust:   1 2/3 cups flour

2 Tbsp. sugar

¼ tsp. salt

¾ cup unsalted butter, soften

5 oz. cream cheese, chilled

Filling:   5 oz. semi-sweet chocolate, chopped

¾ cup plus 1 Tbsp. heavy whipping cream, divided

1/8 tsp. almond extract

1 egg yolk

Topping:   2 Tbsp. sliced almonds

1-2 tsp. sugar

Whisk flour, 2 tablespoons sugar and salt in small bowl.  Beat butter and cream cheese in large bowl at low speed 1 ½ minutes or until smooth and blended.  Beat in flour mixture just until combined.  Shape into 2 flat rounds; cover and refrigerate 30 minutes or until chilled.  (Dough can be made 1 day ahead.)

Place chocolate in medium bowl.  Bring ¾ cup of cream to a boil in small saucepan over medium-high heat; pour over chocolate.  Let stand 1 minute; stir until chocolate is melted and smooth.  Stir in almond extract.  Refrigerate 30 minutes or until cool, stirring occasionally.  Meanwhile, whisk egg yolk with remaining 1 tablespoon cream in small bowl until blended.

Heat oven to 375 F.  Line baking sheet with parchment paper.  On lightly floured surface, roll one dough round to 10 inch round, scant ¼ inch thickness.  Using small plate or bowl as guide, cut out 6 (4 ½ inch) rounds, rerolling scraps as necessary; place on baking sheet.  Repeat with remaining dough.

Spoon generous 1 tablespoon chocolate mixture onto each round.  Lightly brush edges with egg yolk mixture.  Fold in half; press and crimp to seal edges.  Using small knife cut one slit in each pie.  Lightly brush with egg yolk mixture; sprinkle with almonds and 1 teaspoon sugar.

Bake 18 to 20 minutes until light golden brown.  Cool on wire rack 20 minutes to serve warm, or cool completely.                     12 mini pies

(Recipe for Chocolate-Almond Half Moon Pies as in Cooking Club Magazine, Fall 2012)

PrintFriendlyShare

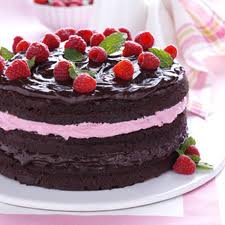
Raspberry Fudge Torte

Raspberry Fudge Torte

Raspberry Fudge Torte

Recipe provided courtesy of Taste of Home magazine.  Find more great recipes at

 www.tasteofhome.com


This special-occasion cake impressed all who see and taste it.  People are surprised to hear this torte starts with a simple cake mix…they’re sure I bought it at a bakery.

            Julie Hein                                                                                           York, Pennsylvania


Raspberry Fudge Torte Recipe

Raspberry Fudge Torte

1 pkg. devil’s food cake mix (regular size)

1 cup (8 oz.) sour cream

¾ cup water

3 eggs

1/3 cup canola oil

1 tsp. vanilla

1 cup miniature semi-sweet chocolate chips

Ganache:   1 cup (6 oz.) semi-sweet chocolate chips

½ cup heavy cream

1 Tbsp. butter

Raspberry Cream:   1 pkg. (10 oz.) frozen sweetened raspberries, thawed

3 Tbsp. sugar

4 tsp. cornstarch

½ cup heavy whipping cream, whipped

Fresh raspberries and mint, optional

In a large bowl, combine the cake mix, sour cream, water, eggs, oil and vanilla; beat on low speed for 30 seconds.  Beat on medium for 2 minutes.  Fold in miniature chips.

Pour into (3) three greased and floured 9 inch round baking pans.  Bake at 350 F. for 25-30 minutes or until a toothpick inserted near the center comes out clean.  Cool for 10 minutes before removing from pans to wire racks to cool completely.

For raspberry cream, mash and strain raspberries, reserving juice; discard seeds.  In a small saucepan, combine sugar and cornstarch; stir in raspberry juice.  Bring to a boil, cook and stir over low heat for 1-2 minutes or until thickened.  Place in a bowl; chill for 30 minutes.  Fold in whipped cream.

Place one cake layer on a serving plate; spread with half of the ganache.  Top with second cake layer and the raspberry cream.  Top with remaining cake layer; spread with remaining ganache.  Store in the refrigerator.             12 serving

(Recipe for Raspberry Fudge Torte was in tasteofhome.com)

PrintFriendlyShare

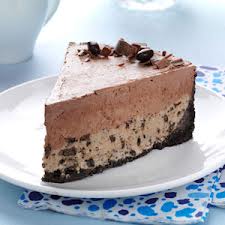
Chocolate-Coffee Bean Ice Cream Cake

Chocolate-Coffee Bean Ice Cream Cake

Chocolate-Coffee Bean Ice Cream Cake

Recipe provided courtesy of Taste of Home magazine.  Find more great recipes at

www.tasteofhome.com


At our school, we celebrate faculty birthdays.  I needed a quick recipe that would be appealing to everyone.  This tall, impressive dessert certainly fit my needs and it was a huge hit.

                           Karen Beck                                                                                             Alexandria, Pennsylvania


Chocolate-Coffee Bean Ice Cream Cake Recipe

Chocolate-Coffee Bean Ice Cream Cake

1 ¾ cups chocolate wafer crumbs (about 28 wafers) (Use chocolate cookies)

¼ cup butter, melted

2 quarts coffee ice cream, softened

1/3 cup chocolate-covered coffee beans, finely chopped

2 ¼ cups heavy whipping cream

1 cup plus 2 Tbsp. confectioners’ sugar

½ cup plus 1 Tbsp. baking cocoa

½ tsp. vanilla extract

Chocolate curls and additional chocolate-covered coffee beans

In a small bowl, combine wafer/cookies crumbs and butter; press onto the bottom and up sides of a 9 inch greased springform pan.  Freeze for 10 minutes.

In a large bowl, combine ice cream and coffee beans; spoon over crust.  Cover and freeze for 2 hours or until firm.

In a large bowl, beat cream until it begins to thicken.  Add confectioners’ sugar, cocoa and vanilla; beat until stiff peaks form.  Spread over ice cream.  (Pan will be full.)

Cover and freeze and 4 hours or overnight.  Remove from the freezer 10 minutes before serving.  Garnish with chocolate curls and coffee beans.            12 servings

(Recipe for Chocolate-Coffee Bean Ice Cream Cake was in tasteofhome.com)

PrintFriendlyShare

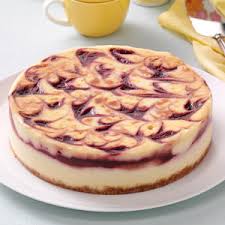
Raspberry & White Chocolate Cheesecake

Raspberry & White Chocolate Cheesecake

Raspberry & White Chocolate Cheesecake

Recipe provided courtesy of Taste of Home magazine.  Find more great recipes at www.tasteofhome.com


My mom makes this dessert a lot because it’s so good and really pretty.  She calls it a “go-to” recipe.  Someday I’ll try to make it myself.

Raspberry & White Chocolate Cheesecake Recipe

Raspberry & White Chocolate Cheesecake

1 pkg. (10 oz.) frozen sweetened raspberries, thawed

1 Tbsp. cornstarch

Crust:   1 cup flour

2 Tbsp. sugar

½ cup cold butter

Filling:   4 pkg. (8 oz. each) cream cheese, softened

1 ½ cups sugar

1 ¼ cups heavy whipping cream

2 tsp. vanilla

2 eggs, lightly beaten

12 oz. white baking chocolate, melted and cooled

In a small saucepan, mix raspberries and cornstarch until blended.  Bring to a boil; cook and stir 1-2 minutes or until thickened.  Then press through a fine-mesh strainer into a bowl; discard seeds.  Cool completely.

Preheat oven to 350 F.   Place a greased 9 inch springform pan (with 3 inch sides) on top of a double thickness of heavy-duty foil (about 18 inch square).  Wrap foil securely around pan.

For crust, in a small bowl, mix flour and sugar.  Cut in butter until crumbly.  Press onto bottom of prepared pan.  Place pan on a baking sheet.  Bake 20-25 minutes or until golden brown.  Cool on a wire rack.  Reduced oven setting 325 F.

For filling, in a large bowl, beat cream cheese and sugar until smooth.  Beat in cream and vanilla.  Add eggs; beat on low speed just until blended.  Stir in cooled chocolate.

Pour half of the mixture over crust.  Spread with half of the raspberry puree.  Top with the remaining batter.  Drop remaining puree by tablespoonfuls over top.  Cut through batter with a knife to create swirls.

Place springform pan in a larger baking pan; add 1 inch of hot water to larger pan.  Bake 1 ¾ to 2 hours or until edge of cheesecake is set and golden.  (Center of cheesecake will jiggle when moved.)   Remove springform pan from water bath.

Cool cheesecake on a wire rack for 10 minutes.  Loosen cheesecake from pan with a knife; remove foil.  Cool 1 hour longer.  Refrigerate overnight.  Remove rim from pan.

(Recipe for Raspberry & White Chocolate Cheesecake was on tasteofhome magazine, Recipe From Families Just Like Yours, April/May 2013)

PrintFriendlyShare

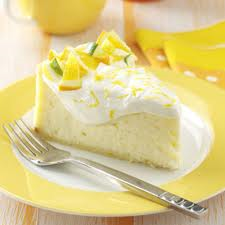
Citrus Cheesecake

Citrus Cheesecake

Citrus Cheesecake

Recipe provided courtesy of Taste of Home magazine.  Find more great recipes at www.tasteofhome.com


Here’s the perfect cheesecake for spring or for a special gathering anytime of year!  The rich, cookie-like crust and creamy filling make the zesty, citrus taste a wonderful surprise.  This dessert takes time to prepare, but one bite will tell you it’s worth it!

Marcy Cella                                                                        L’Anse, Michigan


Citrus Cheesecake Recipe

Citrus Cheesecake

½ cup butter, softened

1/3 cup sugar

1 egg yolk

½ tsp. vanilla

1 ¼ cups flour

Filling:   5 packages (8 oz. each) cream cheese, softened

1 ¾ sugar

3 Tbsp. flour

1 ½ tsp. grated lemon peel

1 ½ tsp. grated orange peel

¼ tsp. vanilla

5 eggs, lightly beaten

2 egg yolks. Lightly beaten

¼ cup heavy whipping cream

TOPPING:   1 ½ cups (about 12 oz.) sour cream

3 Tbsp. sugar

1 tsp. vanilla


In a large bowl, cream butter and sugar until light and fluffy.  Beat in egg yolk and vanilla.  Combine flour and lemon peel; gradually add to creamed mixture.  Mix until dough forms a ball and pulls away from the sides of the bowl.  Divide dough in half; cover and refrigerate for 1 hour or until easy to handle.

Remove sides of a 9 inch springform pan.  Grease bottom.  Between waxed paper, roll half the dough to fit bottom of pan.  Peel off top paper; invert dough onto bottom of pan.  Remove paper; trim dough to fit pan.

Place on a baking sheet.  Bake at 400 F. for 6-8 minutes or until light browned.  Cool completely on a wire rack.

Attach sides of the pan and grease sides.  Pat remaining dough 1 ½ inch up sides of pan, pressing dough to bottom crust to seal.

For filling, in another large bowl, beat the cream cheese, sugar, flour, peels and vanilla until smooth.  Add eggs and yolks; beat on low speed just until combined.  Stir in cream just until combined.  Pour into crust.  Return pan to baking sheet.

Bake at 400 F. for 10 minutes.  Reduce heat to 325 F.; bake 55-65 minutes or until center is almost set.  Cool on a wire rack for 10 minutes.

Carefully run a knife around edge of pan to loosen; cool 1 hour longer.  Combine topping ingredients; spread over cheesecake.  Refrigerate overnight.          12-14 servings


(Recipe for Citrus Cheesecake was on www.tasteofhome.com)

PrintFriendlyShare

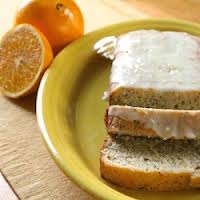
Orange-Poppy Seed Pound Cake with Orange Glaze


Orange-Poppy Seed Pound Cake with Orange Glaze

Orange-Poppy Seed Pound Cake with Orange Glaze

This cake manages to be rich and buttery without being too heavy.  What’s the trick?  Whip lots of air into the butter to lighten the texture, and don’t skimp on the eggs.  Freshly squeezed orange juice and lots of zest give this cake its bright flavor.

Orange-Poppy Seed Pound Cake with Orange Glaze Recipe

Orange-Poppy Seed Pound Cake with Orange Glaze


1 ¾ cups cake flour

¼ poppy seeds

1 tsp. baking powder

½ tsp. salt

1 cup unsalted butter, softened

1 ¼ cups sugar, divided

4 eggs, separated, room temperature

¼ cup orange juice

2 Tbsp. grated orange peel

Glaze:   1 Tbsp. orange juice

1 Tbsp. heavy whipping cream

1 tsp. grated orange peel

½ to ¾ cup powdered sugar, sifted

Heat oven to 350 F.  Spray 9×5 inch loaf pan with cooking spray; line bottom with parchment paper.  Spray paper; dust with flour, tapping out excess.  Whisk flour, poppy seeds, baking powder and salt in medium bowl.

Beat butter and 1 cup of the sugar in large bowl at medium high speed 4 minutes or until light and fluffy.  Add egg yolks one at a time, beating well after each addition.  Beat in ¼ cup orange juice and 2 tablespoons orange peel.  At low speed, beat in flour mixture just until combined.

Beat egg whites in large bowl at high speed 20 seconds or until foamy.  Slowly beat in remaining ¼ cup sugar, beating until glossy stiff peaks form.  Stir one-third of the egg whites into cake mixture to lighten batter; gently fold in remaining whites in two parts.  Pour into pan.

Bake 50 to 55 minutes or until wooden skewer inserted in center comes out clean.  Cool in pan on wire rack 10 minutes; remove from pan.  Cool completely on wire rack.

Combine 1 tablespoon orange juice, cream and 1 teaspoon orange peel in small bowl; whisk in ½ cup powdered sugar, adding additional powdered sugar to desired glaze consistency.  Spoon over cake; let stand until set.

(Recipe for Orange-Poppy Seed Pound Cake with Orange Glaze was in Cooking Club magazine, Spring 2013)

PrintFriendlyShare

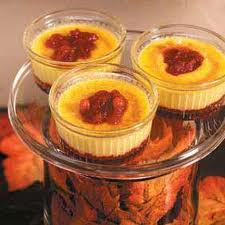
Cranberry Crème Brulee

Cranberry Creme Brulee

Cranberry Creme Brulee

Recipe provided courtesy of Taste of Home magazine.  Find more great recipes at www.tasteofhome.com.


Our home economists dress up classic crème brulee with an easy-to-make cranberry sauce.  The sweet-tart sauce compliments the rich, creamy custard.


Cranberry Crème Brulee Recipe

Cranberry Crème Brulee

1 pkg. (12 oz.) fresh or frozen cranberries

1 cup sugar

¾ cup water

1/8 tsp. salt

Custard:   2 ½ cups heavy whipping cream, divided

1 tsp. vanilla

10 egg yolks

2/3 cup sugar

8 tsp. superfine sugar

In a large saucepan, combine the cranberries, sugar, water and salt.  Cook over medium heat until berries pop; about 15 minutes.  Remove from the heat.  Spoon 2 tablespoons into each of eight 6 oz. custard cups; chill for 10 minutes.  Refrigerate remaining cranberry sauce until serving.

In a small saucepan, heat 1 cup cream over medium heat until bubbles form around sides of pan.  Remove from heat; stir in vanilla.  In a large bowl, whisk egg yolks until smooth.  Gradually whisk in heated cream mixture.  Gradually stir in remaining cream.

Transfer to eight 6 oz. ramekins or custard cups.  Place ramekins in a baking pan; add 1 inch of boiling water to pan.  Bake, uncovered at 325 F. for 35-40 minutes or until centers are just (mixture will jiggle).  Remove ramekins from water bath; cool for 10 minutes.  Cover and refrigerate for 8 hours or overnight.

Just before serving, blot custard with paper towels to remove any moisture.  Sprinkle each up with 1 teaspoon superfine sugar; place on a baking sheet.  Broil 3 – 4 inches from the heat for 1 – 2 minutes or until sugar turns golden brown.  Serve with remaining cranberry sauce.       8 servings

(Recipe for Cranberry Crème Brulee is from www.tasteofhome.com, 2012)

Go onto my site: annettes-sweet-treats.com, and leave a message – it’s at the top of each recipe on the right side…it will tell you to leave a comment.  I would like to know your thoughts of the recipe.

PrintFriendlyShare