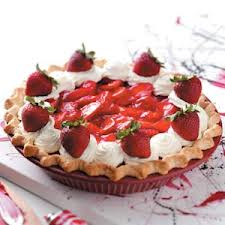
Old-Fashioned Strawberry Pie

Old-Fashioned Strawberry Pie

Old-Fashioned Strawberry Pie


Recipe provided courtesy of Taste of Home magazine.  Find more great recipes at

www.tasteofhome.com


I’ve been cooking since I was a girl and I especially enjoy making fresh, fruity desserts like this.  It’s wonderful and light for warm weather or after a large meal.  A must when fresh berries are in season!!

          Erica Cooper                                                                      Elk River, Minnesota


Old-Fashioned Strawberry Pie Recipe


Old-Fashioned Strawberry Pie

1 sheet refrigerated pie pasty

1 package (3 oz.) cook-and-serve vanilla pudding mix

1 ½ cups water

1 tsp. lemon juice

1 package (.3 oz.) sugar-free strawberry gelatin

½ cup boiling water

4 cups sliced fresh strawberries

3 oz. reduced-fat cream cheese

2 cups reduced-fat whipping topping, divided

1 tsp. vanilla

8 fresh strawberries


On a lightly floured surface, unroll pastry.  Transfer to a 9 inch pie plate.  Trim pastry to ½ inch beyond edge of plate; flute edges.  Line unpricked pastry with a double thickness of heavy-duty foil.  Bake at 450 F.  for 8 minutes.  Remove foil; bake 5-7 minutes longer or until lightly browned.  Cool on wire rack.

In a small saucepan, combine pudding mix, water and lemon juice.  Cook and stir over medium heat until mixture come to a boil.  Cook and stir 1-2 minutes longer or until thickened.  Remove from the heat; set aside.

In a large bowl, dissolve gelatin in boiling water.  Gradually stir in pudding.  Cover and refrigerate for 30 minutes or until thickened.  Fold in sliced strawberries.  Transfer to crust.

For topping, in another bowl, beat cream cheese, ½ cup whipped topping and vanilla until smooth.  Fold in remaining whipped topping.  Cut a small hole in the corner of a pastry or plastic bag; insert a medium star tip.  Fill with topping.  Pipe topping around edges of pie; garnish with whole strawberries.  Refrigerate for at least 1 hour.                 8 servings


(Recipe for Old-Fashioned Strawberry Pie was on www.tasteofhome.com, 2014)
PrintFriendlyShare

Gluten-Free Kahlua Dessert


Gluten-Free Kahlua Dessert

Gluten-Free Kahlua Dessert

Recipe provided courtesy of Taste of Home magazine.  Find more great recipes at

www.tasteofhome.com


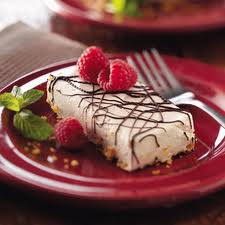
Whether you eat a gluten-free diet or not, you’ll delight in every bite of this creamy treat that’s accented with subtle notes of Kahlua.  This recipe is Diabetic Friendly!

           Melissa McCrady                                                             Milwaukee, Wisconsin


Gluten-Free Kahlua Dessert Recipe

Gluten-Free Kahlua Dessert

1 cup gluten-free cornflakes, crushed

2 Tbsp. butter, melted

2 tsp. unflavored gelatin

¼ cup cold water

12 oz. reduced-fat cream cheese

2 Tbsp. sugar

2/3 cup fat-free sweetened condensed milk

¼ cup Kahlua (coffee liqueur)

2 cups fat-free whipped topping

2 oz. dark chocolate candy bar, melted

Fresh raspberries and mint leaves, optional

Combine cornflakes crumbs and butter; press onto the bottom of a 9 inch square pan coated with cooking spray.  Refrigerate for 10 minutes.

Meanwhile, in a small saucepan, sprinkle gelatin over cold water; let stand for 1 minute.  Heat over low heat, stirring until gelatin is completely dissolved.  Remove from heat; set aside.

In a large bowl, beat cream cheese and sugar until smooth.  Beat in the milk, Kahlua and gelatin mixture until blended.  Gently fold in whipped topping; pour over crust.  Cover and refrigerate for at least 4 hours or until firm.

Drizzle with melted chocolate; garnish with raspberries and mint leaves if desired.       12 servings


(Recipe for Gluten-Free Kahlua Dessert was on www.tasteofhome.com, 2014)
PrintFriendlyShare

Roasted Pepper Potato Soup


Roasted Pepper Potato Soup

Roasted Pepper Potato Soup

Recipe provided courtesy of Taste of Home magazine.  Find more great recipes at

www.tasteofhome.com


I really enjoy potato soup, and this rich creamy version is different than most I’ve tried.  I like its lemon and cilantro flavors, but you can adjust the ingredients to best suit your family’s taste buds.

          Hollie Powell                                                                     St. Louis, Missouri


Roasted Pepper Potato Soup Recipe

Roasted Pepper Potato Soup

2 medium onions, chopped

2 Tbsp. canola oil

1 jar (7 oz.) roasted sweet red peppers, undrained and chopped

1 can (4 oz.) chopped green chilies, drained

2 tsp. ground cumin

1 tsp. salt

1 tsp. ground coriander

3 cups diced peeled potatoes

3 cups vegetables broth

2 Tbsp. minced fresh cilantro

1 Tbsp. lemon juice

½ cup reduced-fat cream cheese, cubed


In a large saucepan, sauté onions in oil until tender.  Stir in the roasted peppers, chilies, cumin, salt and coriander.  Cook and stir for 2 minutes.  Stir in potatoes and broth; bring to a boil.

Reduce heat; cover and simmer for 10-15 minutes or until potatoes are tender.  Stir in cilantro and lemon juice.  Cool slightly.  In a blender, process the cream cheese and half of the soup until smooth.  Return all to pan and heat through.                6 servings


(Recipe for Roasted Pepper Potato Soup was on www.tasteofhome.com, 2014)
PrintFriendlyShare

No-Bake Chocolate Swirl Cheesecake

No-Bake Chocolate Swirl Cheesecake

No-Bake Chocolate Swirl Cheesecake


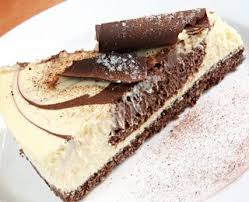
Only 15g carbs in a serving of this popular cheesecake, graced with swirls of real chocolate.  (This recipe is Diabetic Friendly!!)

No-Bake Chocolate Swirl Cheesecake Recipe


No-Bake Chocolate Swirl Cheesecake

½ cup finely crushed graham crackers

2 Tbsp. butter, melted

1 envelope unflavored gelatin

¾ cup fat-free milk

2 packages of (8 oz. each) reduced-fat cream cheese (Neufchatel), softened

1 package (8 oz.) fat-free cream cheese, softened

1 carton (8 oz.) fat-free dairy sour cream

1/3 cup sugar or sugar substitute equivalent to 1/3 cup sugar

2 tsp. vanilla

4 oz. semi-sweet chocolate, melted and cooled

Chocolate curls (optional)

In a medium bowl, stir together finely crushed graham crackers and melted butter until crumbs are moistened.  Press mixture evenly onto bottom of an 8 inch springform pan (may not completely cover bottom).  Cover and chill while preparing filling.

In a small saucepan, sprinkle gelatin over milk; let stand for 5 minutes.  Heat and stir over low heat just until gelatin is dissolved.  Remove from heat.  Cool for 15 minutes.

In a large bowl, beat cream cheese with an electric mixer until smooth.  Beat in sour cream, sugar and vanilla until well mixed; gradually beat in gelatin mixture.  Divide mixture in half.  Gradually stir melted chocolate into half of the mixture.

Spoon half of the chocolate mixture over chilled crust in pan; spread evenly.  Carefully spoon half of the white mixture over chocolate mixture in small mounds.  Using a narrow, thin-bladed metal spatula or a table knife, swirl chocolate and white mixtures.  Top with remaining chocolate mixture, spreading evenly; spoon remaining white mixture over chocolate mixture in small mounds a swirl again.  Cover and chill about 6 hours or until set.

To serve, using a small knife, loosen cheesecake from side of springform pan; remove side of pan.  Cut cheesecake into wedges.  If desired, garnish with chocolate curls.         16 servings

Make-ahead Directions:  Prepare as directed through step 4, except cover and chill for up to 24 hours.  Serve as directed in step 5.

(Recipe for No-Bake Chocolate Swirl Cheesecake came from Diabetic Connect by Eating Well, September, 2013)

PrintFriendlyShare

Butterscotch Bliss Layered Dessert

Butterscotch Bliss Layered Dessert

Butterscotch Bliss Layered Dessert


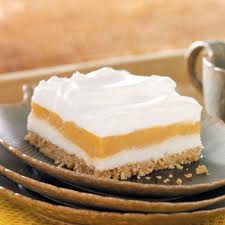
Four easy layers come together for a fantastic treat that’s perfect for cooling down summer nights.  Take this to a gathering, and we bet you’ll bring home an empty dish!  (This recipe is Diabetic Friendly!)

        Janice Vemon                                                    Las Cruces, New Mexico


Butterscotch Bliss Layered Dessert Recipe

Butterscotch Bliss Layered Dessert

1 ½ cups graham cracker crumbs

Sugar substitute equivalent to ½ cup sugar, divided

6 Tbsp. butter, melted

2 packages (8 oz. each) reduced-fat cream cheese

3 cups cold fat-free milk, divided

2 packages (1 oz. each) sugar-free instant butterscotch pudding mix

1 carton (8 oz.) frozen reduced-fat whipped topping, thawed

½ tsp. rum extract

In a small bowl, combine the cracker crumbs, ¼ cup sugar substitute and butter.  Press into a 13×9 inch dish coated with cooking spray.

In a small bowl, beat the cream cheese, ¼ cup milk and remaining sugar substitute until smooth.  Spread over crust.

In another bowl, whisk remaining milk with the pudding mix for 2 minutes.  Let stand for 2 minutes or until soft-set.  Gently spread over cream cheese layer.  Combine whipping topping and extract; spread over the top.  Refrigerate for at least 4 hours.             24 servings


(Recipe for Butterscotch Bliss Layered Dessert came from tasteofhome.com)

PrintFriendlyShare

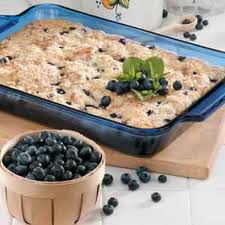
Blueberries ‘N’ Cheese Coffee Cake

Blueberries 'N' Cheese Coffee Cake

Blueberries ‘N’ Cheese Coffee Cake

Recipe provided courtesy of Taste of Home magazine.  Find more great recipes at

www.tasteofhome.com


This is favorite coffee cake.  It is prepared often for guests.  (This recipe is Diabetic Friendly!)

             Taste of Home Test Kitchen                                         Greendale, Wisconsin


Blueberries ‘N’ Cheese Coffee Cake Recipe

Blueberries ‘N’ Cheese Coffee Cake

2 Tbsp. butter, softened

¾ cup sugar

1 egg

2 egg whites

¼ cup unsweetened applesauce

2 Tbsp. canola oil

1 tsp. grated lemon peel

2 ¼ cups flour, divided

1 ¼ tsp. baking powder

1 tsp. salt

½ tsp. baking soda

1 cup buttermilk

2 cups fresh or frozen blueberries

1 package (8 oz.) reduced-fat cream cheese, diced

Topping:   ¼ cup flour

¼ cup sugar

1 tsp. grated lemon peel

2 Tbsp. cold butter

In a large bowl, beat the butter and sugar until crumbly.  Beat in the egg, egg whites, applesauce, oil and lemon peel.  Combine 2 cups flour, baking powder, salt and baking soda; add to the sugar mixture alternately with buttermilk, beating well after each addition.

In a bowl, toss blueberries with remaining flour; fold into batter along with cream cheese.  Pour into a 13×9 inch baking dish coated with cooking spray.

For topping, combine the flour, sugar and lemon peel in a bowl; cut in butter until mixture is crumbly.  Sprinkle over butter.

Bake at 375 F. for 30-35 minutes or until a toothpick inserted near the center comes out clean.  Cool completely on a wire rack.          15 servings


(Recipe for Blueberries ‘N’ Cheese Coffee Cake was in tasteofhome.com)

PrintFriendlyShare

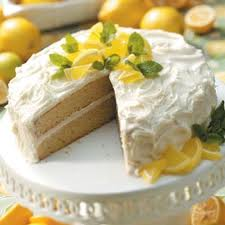
Lemonade Layer Cake

Lemonade Layer Cake

Lemonade Layer Cake

Recipe provided courtesy of Taste of Home magazine.  Find more great recipes at www.tasteofhome.com

Lemonade concentrate gives both the cake and frosting fantastic flavor.  I like to garnish this dessert with lemon slices and mint leaves.

Jana Randich                                                                                     Phoenix, Arizona

Lemonade Layer Cake Recipe

Lemonade Layer Cake

 6 Tbsp. butter, softened

1 1/3 cups sugar

3 Tbsp. thawed lemonade concentrate

2 Tbsp. grated lemon peel

2 tsp. vanilla

2 eggs

2 egg whites

2 cups flour

1 tsp. baking powder

½ tsp. baking soda

¼ tsp. salt

1 ¼ cups buttermilk

Frosting:   1 package (8 oz.) reduced-fat cream cheese

2 Tbsp. butter, softened

2 Tbsp. grated lemon peel

2 tsp. thawed lemonade concentrate

1 tsp. vanilla

3 ½ cups confectioners’ sugar

In a large bowl, beat butter and sugar until crumbly, about 2 minutes.  Add the lemonade concentrate, lemon peel and vanilla; mix well.  Add eggs and egg whites, one at a time, beating well after each addition.  Combine the flour, baking powder, baking soda and salt.  Add to the butter mixture alternately with buttermilk, beating well after each addition.

Coat two 9- inch round baking pans coated with cooking spray and dusted with flour.  Pour batter into prepared pans.

Bake at 350 F. for 18-22 minutes or until a toothpick inserted near the center comes out clean.  Cool for 10 minutes before removing from pans to wire rack to cool completely.

For frosting: in small bowl, combine cream cheese and butter until smooth.  Add the lemon peel, lemonade concentrate and vanilla; mix well.  Gradually beat in confectioners’ sugar until smooth.  Spread frosting between layers and over top and sides of cake.  Refrigerate for at least hour before serving.  Refrigerate leftovers.            16 servings 

(Recipe for Lemonade Layer Cake was on www.tasteofhome.com)

Go onto my site: annettes-sweet-treats.com, and leave a message – it’s at the top of each recipe on the right side…it will tell you to leave a comment.  I would like to know your thoughts of the recipe.

PrintFriendlyShare

Cheesecake Phyllo Cups

Cheesecake Phyllo Cups

Cheesecahe Phyllo Cups

Recipe provided courtesy of Taste of Home magazine.  Find more great recipes at www.tasteofhome.com.


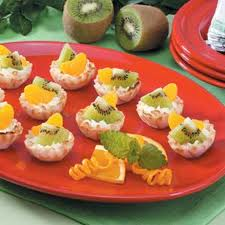
This recipe, Cheesecake Phyllo Cups, is from a friend, whose husband is diabetic.  She has been making the colorful cheesecake bites ever since.  Topped with kiwi fruit and mandarin oranges, they are just delicious.

Cheesecake Phyllo Cups Recipe

Cheesecake Phyllo Cups

4 oz. reduced-fat cream cheese

½ cup reduced-fat sour cream

Sugar substitute equivalent to 2 Tbsp. sugar

1 tsp. vanilla

2 pkg. (2.1 oz. each) frozen miniature phyllo tart shells, thawed

1 can (11 oz.) mandarin oranges slices, drained or get DelMonte No Sugar Added Mandarin Oranges

1 kiwifruit, peeled, sliced and cut into quarters

In a large bowl, beat cream cheese, sour cream, sugar substitute and vanilla until smooth.

Pipe or spoon into phyllo shells.  Top each with an orange segment and kiwi piece.  Refrigerate until serving.                2 ½ dozen

(Recipe for Cheesecake Phyllo Cups is from www.tasteofhome.com, 2012)

Go onto my site: annettes-sweet-treats.com, and leave a message – it’s at the top of each recipe on the right side…it will tell you to leave a comment.  I would like to know your thoughts of the recipe.

PrintFriendlyShare

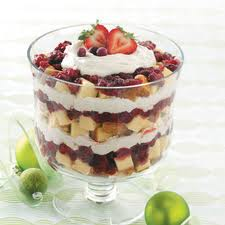
Makeover Cranberry Trifle

Makeover Cranberry Trifle

Makeover Cranberry Trifle

Recipe provided courtesy of Taste of Home magazine.  Find more great recipes at www.tasteofhome.com.


You’d never guess that this showstopper fruit trifle recipe has been lightened up because it boasts all of the original’s festive flavor, but only half the fat and way fewer calories!

                Sonya Labbe                                                                      Santa Monica, California

Makeover Cranberry Trifle Recipe

Makeover Cranberry Trifle

1 pkg. (16 oz.) frozen unsweetened strawberries, thawed

1 pkg. (12 oz.) fresh or frozen cranberries

1 cup sugar

½ cup water

4 tsp. grated orange peel

1 pkg. (8 oz.) reduced-fat cream cheese

¼ cup packed light brown sugar

½ tsp. vanilla

1 carton (8 oz. frozen whipped topping, thawed

2 loaves (10 ¾ oz. each) frozen reduced-fat pound cake, thawed and cubed


In a large saucepan, combine the first five ingredients.  Cook over medium heat until the berries pop, about 15 minutes.  Cool completely.

Meanwhile, in a large bowl, beat the cream cheese, brown sugar and vanilla until smooth.  Fold in whipped topping.

Place a third of the cake cubes in a 3-qt. trifle bowl; top with a third of the cranberry mixture and a third of the cream cheese mixture.  Repeat layers twice.  Cover and refrigerate for at least 2 hours before serving.      15 servings


 (Recipe for Makeover Cranberry Trifle is from www.tasteofhome.com, 2012)

Go onto my site: annettes-sweet-treats.com, and leave a message – it’s at the top of each recipe on the right side…it will tell you to leave a comment.  I would like to know your thoughts of the recipe.

PrintFriendlyShare